For many of us, makeup is a form of self-expression and can make us feel confident and beautiful.
However, it can be overwhelming to navigate the world of makeup, especially if you're new to it.
From choosing the right products to applying them correctly, there's a lot to consider.
In this article, we will provide a step-by-step guide on how to apply makeup that will leave you feeling confident and looking your best.
Whether you're a beginner or a professional makeup artist, this guide will teach you everything you need to know.
What Is makeup application
Makeup application is simply the act of putting on makeup to enhance or change one's appearance.
It usually involves using different types of cosmetic products such as makeup primer, foundation, lipstick, eye shadow, and so on. The goal is to highlight your facial features and create a desired look. It can be anything from a natural, everyday look to a more dramatic, bold look for a special occasion.
I like to think of makeup application as part of your overall outfit. You put on makeup just as you would put on any form of clothing or piece of jewelry, not just to cover up your body to look and feel good, and at the end of the day, you get to take it off and just be your natural self.
The process of makeup application typically involves cleansing and moisturizing the skin, applying a base primer, and then applying the makeup products in a particular order. The techniques and tools used may vary depending on the individual's skin type and facial features.
Importance of proper makeup application
Proper makeup application is important for a variety of reasons, including:
- Enhancing your natural features: Makeup can help bring out your best features, such as your eyes, lips, or cheekbones, and make them look more defined.
- Boosting your confidence: When you look good, you feel good. Proper makeup application can help boost your confidence and self-esteem, allowing you to feel more comfortable and self-assured in your appearance.
- Protection: Certain makeup products, such as foundation and sunscreen, can help protect your skin from harmful UV rays and environmental pollutants.
- Professional appearance: For people in certain professions, such as acting or modeling, proper makeup application is essential to create the desired look for a role or photo shoot.
- Self-expression: Makeup is a form of self-expression and can be used to express your personality, creativity, and style.
Overall, proper makeup application can help you feel good about yourself, protect your skin, and enhance your natural beauty.
Now let's get down to business. We know you've watched dozens of makeup tutorials online and if we're honest not everyone does their makeup the same way.
So with that in mind, the steps we're going to show you are only a guideline and can be modified to suit your makeup needs.
How to Apply Makeup Flawlessly Step by Step
Step 1: Preparation
Don't just go slathering products onto your bare face. Preparing your face before applying makeup is essential to ensure that your makeup looks flawless and lasts longer. Here are some steps you can follow to prepare for makeup application:
-
Cleanse your face: Start by cleansing your face with a gentle cleanser to remove any dirt, oil, or makeup residue. Rinse your face with lukewarm water and pat it dry with a clean towel.
-
Moisturize your skin: Use a moisturizer to hydrate your skin and create a smooth canvas for your makeup. You can also use a toner, serum, or oils that you use in your normal skincare routine before your moisturizer.
-
Apply sunscreen: Apply a broad-spectrum sunscreen with an SPF of 30 or higher to protect your skin from harmful UV rays.
-
Prime your face: Use a primer to create a smooth base for your makeup. A primer can also help to minimize the appearance of pores and fine lines, as well as help your makeup to stay in place for longer.
-
Prep your lips: If you plan to wear lipstick or lip gloss, exfoliate your lips with a lip scrub or toothbrush to remove any dead skin. Apply a lip balm or moisturizer to hydrate your lips.
-
Prepare your tools: Make sure that your makeup brushes and sponges are clean and dry before using them. You can wash your brushes with a gentle cleanser and let them air dry before using them to apply your makeup.
-
Choose the right products for your skin type: Knowing your skin type will help you choose products that are specifically formulated for your skin's needs. For example, if you have oily skin, you may want to choose a mattifying primer to help control shine. If you have dry skin, you may want to choose a hydrating primer to help boost moisture. Also, choose products that work well together: If you're using multiple skin prep products, make sure they work well together. For example, if you're using a moisturizer, serum, or primer, make sure they don't contain ingredients that could cause pilling or separation.
While layering your moisturizer, sunscreen, and primer, make sure you're waiting for at least a minute between each application for the products to absorb fully into your skin before you go in with your makeup. I find that the best way to apply skin prep is by using your fingertips to gently massage the products into the skin.
For your moisturizer and sunscreen apply a generous amount all over your face, but go sparingly with the primer. A dime size amount is often usually enough. Start from the center of the face, focusing on the T-zone and gradually work your way outwards.
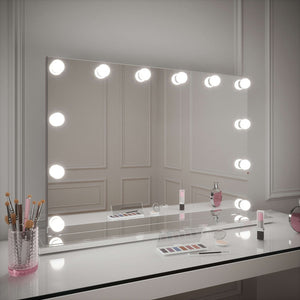
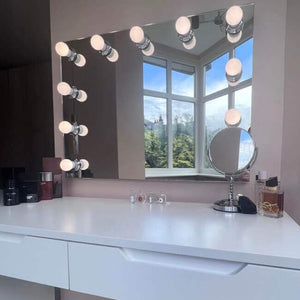
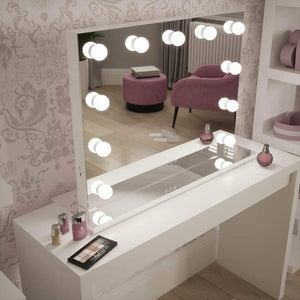
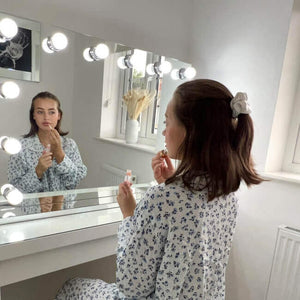
Also part of your preparation for makeup application includes having a good makeup mirror and a good source of natural light. Avoid doing your makeup in dim lighting as this can mess up how your shade match turns out.
Step 2: Foundation
Once your skin is nice and prepped, it's time to go in with some foundation. There are lots of foundations out there and they come in three main formulas- liquid, cream/stick, and powder foundation and they all perform the same function. They help to create a more even complexion. Depending on the brand and formula, different foundations offer different coverage levels, and your makeup needs will determine which you should go for. Full coverage to medium foundations is great if you want to cover up blemishes and light coverage foundations or BB creams are best for that natural skin-like makeup look.
How to choose the right shade of foundation
Your foundation should be the exact shade of your skin, not darker and not lighter. To find the right shade you must know your skin's undertone. There are cool, warm, and neutral undertones. Cool undertones have pink, red, or blue undertones; warm undertones have yellow, golden, or peach undertones, while neutral undertones have a mix of warm and cool undertones.
Next, consider the level of coverage you want. For example, if you're looking for natural, sheer coverage, you may want to go for a foundation that's slightly lighter than your skin tone. If you're looking for full coverage, you may want to choose a foundation that matches your skin tone exactly. another way to get your exact shade is to test the foundation on your jawline to see how it looks against your neck and chest and don't forget to try it out in natural lighting.
Lastly, if you still have trouble finding your shade match, it's always better to choose a slightly lighter shade than a darker one. You can always use bronzer or contour to add warmth to your complexion.
How to apply foundation for a natural look
Getting the right shade of foundation is important to achieving a natural look, so also is getting the right foundation for your skin type. If you have oily skin, opt for a matte foundation, and if you have dry skin, go for a hydrating foundation.
Once you have that sorted out, it's time to learn how to apply your foundation. Start with a small amount and apply it in small dots all over your face. Use a beauty blender, foundation brush, or clean fingertips to blend the foundation onto your skin.
While blending, pay extra attention to blending the foundation around the edges of your face, where it can be more noticeable. Blend the foundation into your hairline, jawline, and around your nose and mouth to avoid any harsh lines then set the foundation in place using a setting powder.
Tips for blending and setting the foundation
For beginners, I recommend using a damp makeup sponge to blend out your foundation because it helps to avoid streaks and gives a more natural finish, and don't forget to apply it in thin layers. That way, you can gradually build coverage without looking cakey or heavy.
Lastly to set your foundation, use a powder puff or a large fluffy brush to apply the powder lightly all over your face. The step is especially important if you're using a liquid foundation as it helps to get rid of any tackiness or shine.
Step 3: Concealer
After foundation comes concealer which is mostly in cream and liquid forms. They're used to brighten dark circles, cover up spots and highlight the face.
How to choose the right shade
Choose a concealer that matches your undertone. But get one that's one or two shades lighter than your skin tone, as this will help to brighten and highlight the under-eye area.
Choose a formula that suits your skin type. If you have dry skin, you may want to opt for a creamy formula, while oily skin types may prefer a liquid formula.
How to apply concealer to hide blemishes and dark circles
To cover up your blemishes, apply a tiny amount directly to the blemish and blend with your finger or a brush. For your dark circles, use a small, flat brush to apply concealer in a triangle shape under your eyes. Start from the inner corner of your eye and bring it down to the outer corner of your nose and then up to the outer corner of your eye. Blend it in with your finger or a brush until it's seamless with your skin. You can also use your concealer to highlight the forehead, nose, and chin.
Next, set your concealer with a loose powder to prevent creasing.
Tips for blending and setting the concealer
If you want a smooth no creasing concealer application, then the first thing you should do to apply a small amount, wait a minute for the concealer to get tacky, then blend it out with a brush or damp beauty sponge. To set, you can make use of the damp sponge you used in blending or a powder puff to gently press in the setting powder.
Lastly, use a patting motion when blending instead of rubbing or swiping. This will help your concealer blend more naturally and prevent it from shifting.
Step 4: Powder
There are two types of powder- pressed and loose. Pressed powders are easier to carry around and give a more natural finish while loose powders provide more coverage but can be messy to apply.
Applying powder can be a bit tricky because too much of it could result in a cakey makeup look. You want to ensure that you're using the right shade and formula and applying it the proper way.
How to choose the right shade and formula
As usual, go for a powder that matches your skin type. If you have oily skin, go for a powder that is mattifying or oil-free. If you have dry skin, choose a powder that is hydrating and doesn't accentuate dry patches.
Always test the shade in natural light to ensure a perfect match. Swipe the powder on your jawline and blend it in to see if it matches your skin tone. Check the ingredients. Look for powders that are non-comedogenic, hypoallergenic, and fragrance-free if you have sensitive skin.
How to apply powder to set the foundation and concealer
The best way to apply powder is by using a powder brush. This is usually a large fluffy brush with soft bristles that helps to evenly distribute the powder and avoid creating a cakey appearance.
You might also want to tap off any excess powder from the brush to avoid applying too much powder on your face, which can lead to a chalky appearance. Focus on your T-zone or areas where you normally get shine and feel free to carry a compact powder with you to touch up throughout the day to keep your makeup looking fresh and matte
Tips for avoiding a cakey or powdery look
If you don't want to achieve that matte effect from applying powder but don't want to look cakey, then use a translucent finishing powder. It won't add extra coverage to your makeup but will set it and help it last longer.
You can also make use of a setting spray in place of powder or together with it to help your makeup last longer and look more natural.
Step 5: Contour and Bronzer
To add definition and warmth to your face, you'll need a contour stick and bronzer.
How to choose the right shade of contour and bronzer
When choosing a contour shade, opt for a color that is one to two shades darker than your skin tone. If you have fair skin, choose a cool-toned contour shade. For medium skin tones, a warm, medium-toned contour will work well. If you have deep skin, choose a rich, warm-toned contour shade to enhance your features.
For bronzer, if you have fair skin, choose a light, cool-toned bronzer to avoid looking too orange. For medium skin tones, a warm, medium-toned bronzer will work well. If you have deep skin, choose a rich, warm-toned bronzer to complement your complexion.
Also, consider the finish. Bronzers and contours come in different finishes, such as matte or shimmer. If you want a more natural look, opt for a matte finish. Shimmery bronzers and contours are perfect for adding a glow to your skin.
How to apply contour and bronzer for a natural look
For a more natural look, apply a matte contour powder or cream that is one to two shades darker than your natural skin tone. Apply it in the hollows of your cheeks, along your hairline, and under your jawline to create definition, then blend properly using a beauty blender to avoid any harsh lines.
To apply bronzer, choose a matte bronzer that is one shade darker than your natural skin tone. Apply sparingly to the areas of your face where the sun naturally hits, such as the forehead, nose, cheeks, and chin, then blend well using a fluffy brush to create a natural-looking glow
Step 6: Blush
For that youthful glow, blush is what you need.
How to choose the right shade for your skin tone
Blush comes in different formulas such as powder, cream, and liquid. Pick a blush that complements your skin tone and undertone. For example, if you have a cool undertone, opt for pink or berry shades. For warm undertones, peach and coral shades work well. If you have a neutral undertone, you can choose from a wider range of colors.
How to apply blush for a natural look
Choose a blush color and apply a small amount to your cheeks. For liquid and cream blush, it's best to blend out immediately with your fingertips, and for powder blush, use a fluffy blush brush and tap off any excess before applying. Where you apply blush may differ based on your face shape, but generally, blush goes on your cheekbones. Smile to find the apples of your cheeks, then starting from the highest point of your cheekbone, blend the blush outwards and upwards towards your temples. This will help create a more natural-looking flush.
If you made a mistake by applying too much blush, you can tone it down by using a damp beauty sponge to blend and soak up the excess blush, then go over with your shade of powder.
Step 7: Highlighter
If you want to add a little bit of glow to your makeup, that's where a highlighter comes in handy. They come in cream, liquid, and powder forms but the application for each is still the same. Here's how to apply highlighter
- Select a highlighter shade that complements your skin tone. If you have fair skin, go for a champagne or pink-toned highlighter. If you have medium skin, try a golden or peachy highlighter. For darker skin, opt for a bronze or copper highlighter.
- Use a small amount of highlighter to avoid overdoing it. You can always build up the intensity as needed.
- Make sure you apply your highlighter in natural light, so you can see how it looks on your skin.
- Apply the highlighter to the high points of your face, such as the tops of your cheekbones, the bridge of your nose, and the cupid's bow.
- Use a powder highlighter for that intense daytime glow and a cream or liquid highlighter for a more natural finish.
Step 8: Eye Makeup
Now we're done with the face, it's time to move on to the eyes. Your eye makeup includes eyeshadow, eyeliner, mascara, and brows.
How to choose the right eye shadow shades
First, choose eyeshadow shades that make your eye color pop. For example, brown eyes can be enhanced with warm shades like bronze and copper, while blue eyes can be complemented with cool shades like gray and silver.
Your skin tone can also influence the eye shadow shades that look best on you. If you have fair skin, you may want to stick to light, pastel shades. If you have medium skin, earthy tones like browns and greens can look great. For those with darker skin tones, rich colors like deep purples and blues can be stunning.
The occasion and choice of outfit can also influence the eye shadow shades you choose. For daytime, you may want to opt for more natural shades, while for nighttime, you can be more adventurous with bold colors like metallics or smoky shades.
Lastly, choose eye shadow shades that complement each other. For example, if you are using a bold shade like bright blue, you may want to pair it with a neutral shade like beige to balance it out.
How to apply eye shadow for a natural or dramatic look
For a Natural Look
- Start by applying a neutral-colored eyeshadow all over your eyelid using an eyeshadow brush. This will create a good base for your eyeshadow and help it to blend better.
- Then, using a slightly darker shade, apply the eyeshadow to the crease of your eye. This will add dimension to your eyes without looking too dramatic.
- Blend the two shades using a clean eyeshadow brush to make sure that there are no harsh lines.
- Apply a light, shimmery eyeshadow to the inner corner of your eyes to brighten them up.
- Finish off with mascara to give your eyes definition and depth.
For a Dramatic Look:
- Start by applying a dark-colored eyeshadow all over your eyelid using an eyeshadow brush. This will create a bold base for your eyeshadow.
- Then, using a slightly lighter shade, apply the eyeshadow to the crease of your eye. This will add dimension to your eyes and make them look more dramatic.
- Blend the two shades using a clean eyeshadow brush to make sure that there are no harsh lines.
- Use a small, angled brush to apply a dark-colored eyeshadow to your lower lash line. This will help to define your eyes and make them look more dramatic.
- Apply a light, shimmery eyeshadow to the inner corner of your eyes to brighten them up.
- Finish off with bold eyeliner and mascara to give your eyes even more definition and drama.
How to apply eyeliner for a defined look
Using your preferred eyeliner (could be gel, liquid, or pencil), draw a thin line as close to the lash line as possible starting from the inner corner till you reach the outer corner of your eye. If you want a more dramatic look, extend the line slightly beyond the outer corner of your eye and create a wing. To do this, angle the brush towards the end of your eyebrow and draw a diagonal line upwards. Then, connect the end of the line to the rest of your eyeliner.
How to apply mascara for fuller lashes
Start by curling your lashes. This will help to lift and separate your lashes, making them look fuller. Next, apply mascara to the base of your lashes and wiggle the wand back and forth to coat the roots of your lashes. This will help to create a fuller look.
Build up the layers until you achieve the desired level of fullness. Be sure to let each coat dry before applying the next. Then comb through your lashes with a clean mascara wand to help separate your lashes and remove any clumps.
If you want your mascara to last all day, finish with a waterproof formula. This will help to prevent smudging and flaking.
How to fill out your eyebrows
Start by brushing your eyebrow hairs upwards and outwards using a spoolie brush or an eyebrow brush.
Determine where you need to fill in your eyebrows. Use a brow pencil or a brow pomade to draw small hair-like strokes in the sparse areas of your eyebrows. Use light pressure when drawing the strokes for a natural look.
If you are using a brow powder, dip your angled brush into the powder and tap off any excess. Then, use short, feathery strokes to fill in your eyebrows. Start from the arch and work your way towards the tail.
Once you have filled in your eyebrows, use the spoolie brush to blend the product and soften any harsh lines. This will give your eyebrows a more natural look.
If necessary, use a concealer or a highlighter to clean up the edges of your eyebrows. This will create a more defined look and make your eyebrows stand out.
Step 9: Lip Makeup
Your makeup isn't complete without lipstick or gloss.
How to choose the right lip color
Two of the most important things to consider when choosing the right lip color are your skin tone and outfit. If you have a warm skin tone, choose lip colors with warm undertones like peach, coral, or orange. If you have a cool skin tone, choose lip colors with cool undertones like pink, purple, or red.
You also want to choose a lip color that complements your outfit and doesn't clash. For example, if you're wearing a bright or patterned outfit, you may want to opt for a more neutral lip color to balance out the look.
How to apply lip color for a natural or bold look
Applying bold or natural lip color is the same. Start by applying a lip balm or primer to keep your lips smooth and moisturized. This will prevent flaking, or cracking. Then line your lips with a lip liner, before going in with your choice of lip color. Whatever you decide, make sure to consider the finish. The finish of your lip color can also impact your overall look. Matte lipsticks can be more dramatic and long-lasting, while glosses can be more sheer and shiny. Satin or creamy finishes can be a great compromise between the two.
Tips for preventing smudging and feathering
Prepping your lips and using a lip primer can help prevent your lipstick from smudging or feathering. Other ways include:
- Apply with a lip brush
- Choosing waterproof, matte, and non-transferable lip formula
- Blotting your lips with a tissue to remove excess product.
- Avoid oily foods, because oil tends to break down makeup.
Step 10: Final Touches
Now we've come to the end of your makeup routine, here are some final tips to help keep your makeup fresh all day.
-
Set your makeup with a setting spray:Lock everything in with a setting or finishing spray. For dry skin, use a hydrating spray and a mattifying spray for oily skin. To apply, hold the spray bottle a few inches from your face and spray 3-4 times in circular motions.
-
Touch up your makeup throughout the day: always have a small makeup kit you can carry in your purse. This should contain, lipstick, compact powder, concealer, blotting paper, makeup vanity mirror, or tissue. Before youapply additional makeup, make sure to blot away any excess oil or sweat.
-
Remove your makeup before bed: at the end of the day, don't forget to remove your makeup. We recommend using an oil-based cleanser to break down all the makeup. For stubborn areas like eyeliner and mascara, miscellar water is a great option. Follow up with your normal facial cleanser and double-cleanse to get rid of every trace of makeup.
Conclusion
Learning how to apply makeup requires time, patience, and practice. You have to be willing to keep practicing and experimenting with makeup till you eventually start getting it right. Just remember to follow the simple steps listed in this article.
Here's a quick reminder- Prep your skin, apply foundation and concealer, set with powder, apply contour, bronzer, blush, highlighter, and lipstick, and finish the look with a setting sorry.
Remember, makeup is meant to make you look and feel good, so don't forget to have some fun while at it, and if you make a mistake, it can always be fixed.


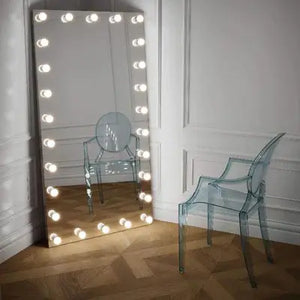
 Angelina Full Length Arch Hollywood Mirror 160 x 60cm
 Angled Luna Mirror-Cheval Black
 Angled Luna Mirror-Cheval Silver
 Art Deco Overmantle Mirror in Grey 105cm x 86.5cm