Eye makeup is an essential component of any makeup routine, as it has the power to transform your overall look and highlight the natural beauty of your eyes.
But creating the perfect eye look that matches the rest of your makeup without ending up looking like a clown is a skill only a few people are born with.
The rest of us just have to practice until we get a hang of it.
Whether you're a beginner or a seasoned makeup enthusiast, mastering the art of eye makeup can seem daunting, especially with the countless products, tools, and techniques available.
However, with a little patience, practice, and the right guidance, you'll soon be able to create a stunning eye makeup look.
In this post, we'll break down the basic steps of eye makeup and provide you with useful tips and tricks to help you achieve a flawless eye makeup look.
From choosing the right eyeshadow blending brushes to applying eyeliner and mascara, we've got you covered.
So, get ready to enhance your eyes and boost your confidence with our ultimate guide on how to do eye makeup.
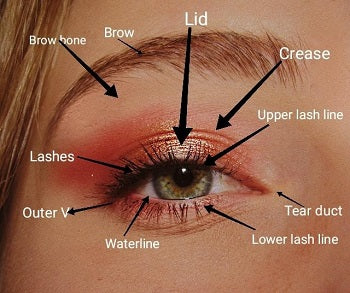
Things You Need For A Flawless Eye Makeup
Before we get started, let's take a look at the things you'll need to create that flawless eye makeup.
1 . Eyeshadow Primer
This will help to create a smooth base for your eyeshadow and ensures that it stays in place all day.
2 . Eyeshadow
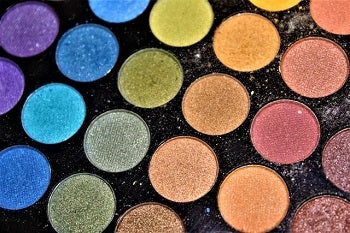
What's eye makeup without eyeshadow? Eyeshadows are available in cream, loose powder, and pressed powder which is the most common because it usually comes as palettes containing different shades. Eyeshadows also come in various finishes like matte, satin, shimmer, glitter, and marbled. To start, you'll need at least one eyeshadow palette with a variety of neutral colors.
3 . Eyeshadow brushes
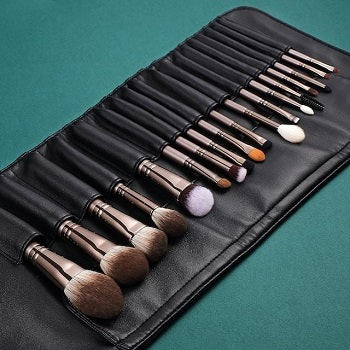
You'll need something to apply your eyeshadow with, and I don't recommend using your fingers. You'll be needing at least six eyeshadow brushes. A small flat concealer brush for blending out concealer on top and under the eyes, you can also use this brush to blend out eyeshadow primer.
A flat eyeshadow brush for packing on eyeshadow onto the eyelid. A crease brush or small angle brush for precise application of eyeshadow on the lid and outer V of the eye.
A fluffy blending brush to blend out transition colors and any harsh lines. An eyeliner brush to line your upper lash line, and a spoolie/mascara wand to comb out your brows or lashes.
4 . Eyeliner
These come in gel, pencil, and liquid forms. To give your eye that defined look.
5 . Mascara
To enhance your lashes and make them appear longer and fuller.
6 . Lash Curler
This is optional, but if you want your natural lashes to look like you had an extension put in, then a lash curler should be in your makeup kit.
7 . False Lashes and Lash glue
Also optional, but highly recommended for those special nights when you're feeling adventurous. There are short ones that mimic your natural lashes and bigger, fuller versions for that full-face glam.
8 . Brow pencil/gel
Unless you're going for the no-brow look or maybe you have naturally thick and well-defined brows, you'll be needing a brow pencil or gel to help you fill in those sparse areas of your brows and define the shape.
9 . Concealer
Dark circles around the eyes is something most people struggle with. This is where a concealer comes in. To help cover up those dark circles, blemishes and even to clean up the shape of your brows.
How To Do Eye Makeup For Beginners
Before we get into the steps on how to do eye makeup, you must be wondering, when should you do your eye makeup? Before or after your face makeup?
Truth is, you can do it either way.
Some people prefer to start with the eyes and then finish up with the rest of the face makeup while others like to start with the face and do the eyes last.
I'd recommend starting with eye makeup for one reason. To allow room for mistakes.
Eyeshadow particles may fall into the face, and the liquid liner could transfer onto your lower lash line, and ruin your foundation.
You don't want that.
Now that you have all the necessary eye makeup tools, let's dive into the steps for achieving a flawless eye makeup look.
Step 1: Prepping the eyelids
The first step in any eye makeup routine is to prep your eyelids. You'll need a clean base so start by cleansing your face and applying your regular moisturizer. Next, apply an eyeshadow primer to your eyelids. This will help to create a smooth base for your eyeshadow while ensuring that the colors pop on your eyelids and that it stays in place all day.
With eyeshadow primer, the trick is to use a little amount. Even if you're going for a cut crease eye look, you still don't have to use much product. Too much could lead to creasing, clumping, or breaking of the eyeshadow.
Step 2: Applying the eye shadow
Applying eyeshadow in itself is quite simple. You just need to determine the kind of eye look you want, and how it fits with your eye shape. Let's be sincere, not everyone can pull off a full-cut crease or bold eye makeup look.
There are six basic eye shapes. There's round, almond, monolid, hooded, downturned, and upturned. And knowing yours is the first step to conquering your eye makeup challenges.
If you have round or almond eyes, you're blessed with a visible creature and lots of lid space. So you can play with literally any kind of eyeshadow look, and even add a dramatic wing liner. For my ladies with hooded, monolid, downturned, or upturned eyes, you have little to no visible crease and oftentimes going for a dramatic eye look like the halo or a cut crease will be much more difficult to achieve with your eye shape.
Now let's head straight to the eyeshadow application. For this, you'll be needing your desired shades of eyeshadow and your eyeshadow brushes. We'll be showing you how to achieve five different eyeshadow looks.
The Classic Smokey Eye
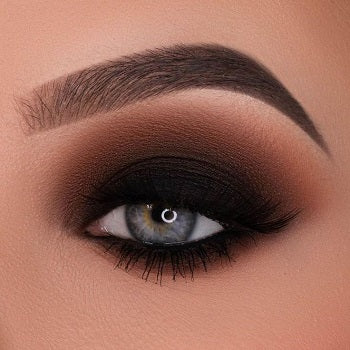
Credit: Pinterest
For this look, you'll need a black cream eyeshadow, a black, brown, and neutral matte eyeshadow, and a gel liner.
- Start by gently spreading the black cream eyeshadow into the eyelid, then go in with the black matte shadow to set it and gradually blend it towards your crease.
- Next, go in with the brown shade and start blending from where the black color stops at the crease toward the brows. Blend in a circular and outward motion.
- Use the black gel eyeliner and line the upper and waterline. Take it further and use a small stiff eyeshadow brush and apply the black eyeshadow on the lower lash line. Follow it up with the same brown shade and blend upwards to connect both the upper and lower lash lines.
- Lastly, go in with the neutral shade or powder to blend out any harsh lines.
Cut Crease
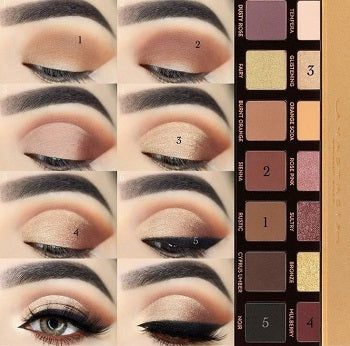
Credit: Pinterest
For this look, you'll need a light and dark matte shade of brown eyeshadow and a champagne shimmer eyeshadow.
- Start by blending the light shade of brown above the crease towards the brows and the outer V of the eyes.
- Go in with the dark brown on the crease and blend till it's seamless.
- Take your flat concealer brush with a tiny bit of concealer in it, and use it to carve out a half circle just above your crease, starting from the tear duct and stopping just below the brow bone.
- Spread out the concealer light in the space you've carved out and apply your shimmer eyeshadow on it.
- Lastly, take that dark brown shade and blend inwards from the outer V towards the center of the lid. To blur the lines between the two colors.
- You can also take it a step further by applying the same dark brown shade to the lower lash line.
The Halo
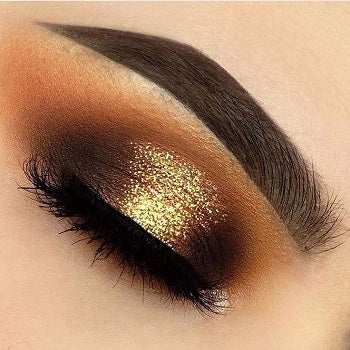
Credit: Pinterest
This eyeshadow look is what I like to call a combination of smokey and cut crease. For this look, you'll need two shades of matte brown eyeshadow, black matte eyeshadow, and a bronze or gold shimmer eyeshadow.
- Start by blending the black shade all over the lid, focusing on the inner and outer corners.
- Go in with the dark brown to blend out the black towards the crease creating that smokey effect.
- Next, use your flat concealer brush to cut above the center of your natural crease and blend downwards.
- Blend out the concealer and apply your shimmer eyeshadow at the center where you cut the crease.
- Use a light shade of brown and blend outwards towards the brows to soften any harsh lines.
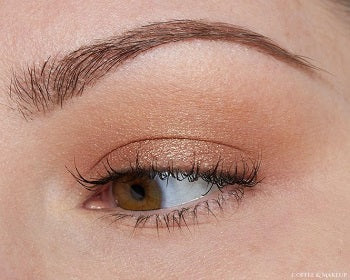
Natural eye makeup
Credit: Pinterest
This type of eyeshadow look is great for that "no makeup makeup look" or just if you're feeling too lazy to apply eyeshadow. To achieve this look, go for nude colors that match your skin tone and apply it all over your lid. Matte eyeshadows are best suited for this type of look.
Use a fluffy blending brush and gently buff your preferred nude eyeshadow all across your eyelids. To give a little glow you could add a little bit of shimmer of the same color of eyeshadow to the center of your lid with your fingertips or add a slighter lighter shade to the inner corners of your eyes.
The problem with this look is that different skin tones will need different shades of nude eyeshadows. For example, bronze, gold, rose and plum shades work well on fair skin. Brown and bronze eyeshadows are great for medium skin tones. Gold eyeshadows for tan skin. Teal and earthy brown shades for olive skin. While rose gold blended with brown hues compliment dark skin.
Gradient

Credit: Pinterest
Aside from the natural eye look, this is probably the second easiest eyeshadow look to practice. All you need is three to four different shades.
- Start by placing your preferred shades on your eyelids. With the lightest shade at the inner corner, the medium shade at the center, and the darkest shade at the outer corner of your eyes.
- Blend from light to darkest and use your shade of powder to soften the edges.
The fun part about this look is that you can decide to use all matte or go all shimmer for all shades of eyeshadow and you'll still create an iconic piece. Just make sure the corners complement each other.
Step 3: Applying eyeliner
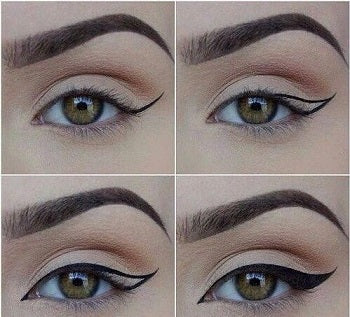
Credit: Pinterest
The next step after eyeshadow is the application of eyeliner. Now there are different types, pencil, gel, and liquid eyeliner.
For beginners, I'd recommended getting a gel and a pencil liner, because they're easier to work with.
Let's leave the liquid liner for the pros. A pencil liner is great for lining your waterline and tight lining while the gel liner is perfect for lining your upper lash line.
To apply your pencil eyeliner, make sure you've sharpened the tip, or get a retractable pencil and gently run it across your waterline. For the gel liner, you'll need a clean eyeliner brush.
Dip the brush into the gel and gently apply a thin line as close as your can to your upper lash line.
Here's an extra tip. You can also use a small flat-angled brush and black eyeshadow to stamp out the shape of your eyeliner. Just make sure to keep it close to your lash line.
To create that winged liner or cat eye look, once you have lined your eyes, start at the outer corner of your eyes and draw a straight thin line from the bottom lash line, extending it upwards toward the tail of your brows, but it shouldn't touch your brows.
From the point where you stopped, start from there and draw another thin line downwards to meet your upper lash line, then fill in empty spaces.
If you're worried about uneven wing lines, you can try placing a small piece of tape under each eye at the outer corner, then go ahead, apply your winged liner and remove the tape.
Voila! You have yourself a perfectly straight line.
Lastly, for some extra oomph, use a smudge brush to blend the eyeliner, creating a softer and more diffused smokey look.
Step 4: Mascara
Credit: Pinterest
After eyeshadow and eyeliner comes the mascara. There are different types such as lengthening, volumizing, and waterproofing. Choose the one that you are most comfortable using and that suits your preferred look.
- The first step to applying mascara is to curl your lashes. This will help open up your eyes and make them appear larger.
- Go ahead and apply your mascara. Start at the base of your lashes and wiggle the mascara wand back and forth, coating your lashes from root to tip. Feel free to use two or three coats of mascara for that dramatic effect.
- Use a lash comb or spoolie brush to comb through your lashes in between each coat of mascara, to separate them and remove any clumps. Also, don't forget to wait for a few seconds for each coat to dry before applying the next.
- Don't forget to apply mascara to your bottom lashes using the same technique as your upper lashes.
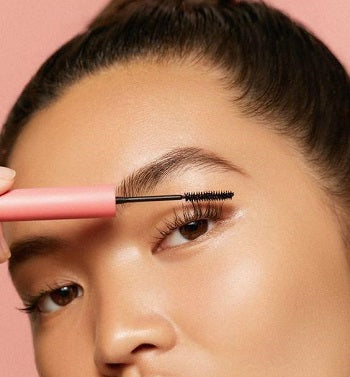
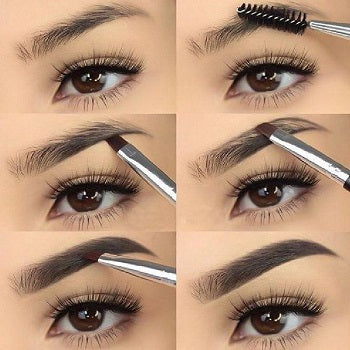
Step 5: Defining the brows
Credit: Pinterest
Defined brows can take your eye makeup from 100% to 1000%. To achieve the perfect brows, you'll need a brow pencil, brow gel, brow tamer, and powder. When picking out your brow product, make sure to go for one that matches your hair color or one that is one or two shades darker for best results.
- Start by brushing your eyebrows in the direction of the hair growth using the spoolie brush.
- With your spoolie a little bit of brow tamer and apply on each brow. Spread it evenly and brush the hairs upwards and sideward. This step is optional but great for those with coarse eyebrow hairs because it will help lay them flat and keep those brows in place all day.
- Using your beauty sponge, puff, or fluffy brush, apply a little bit of loose powder to your brows and dust to suck up the excess oils and further set them in place.
- Now it's time to define your brows. Take your preferred brow product and start filling in the sparse areas of your brows, following the shape of your eyebrows. Use short feathery strokes to mimic hair strands.
- Define your arch by using a slightly darker shade than the rest of your brow, applying it in an upward motion.
- Use a spoolie brush to blend the product, creating a natural look.
- Lastly, using a concealer on a shade lighter than your skin and a flat brush, clean up the bottom of your brows and blend out till there are no harsh lines.
If you have barely visible eyebrows, you might need a different approach.
- Start by mapping out the shape of your brows. With your fingers, try and feel around your eyes. You'll notice your eye sockets and your brow bone. That's where your brows should be. Use a brow pencil and place a tiny mark on the inner and outer corner as a guide on where your brows start and where it ends.
- Next, go in with your brow pencil and draw a line along the bottom of the brow bone area. Your line should start straight from the front of the brows and slightly curve it downwards at the outer corner of your eye. Do the same for the top and let the two lines meet at the end of the brow.
- Gradually fill in the outlined shape of your brows, using light feathery strokes at the front and a shading motion towards the tail of your brows.
- Use a spoolie brush to blend out the product, for that natural look.
- And lastly, clean up the bottom of the brows using a flat brush and concealer. Blend out the top of the brows with your shade of foundation and there you have it. A nice pair of well-defined eyebrows.
Step 6: False Lashes
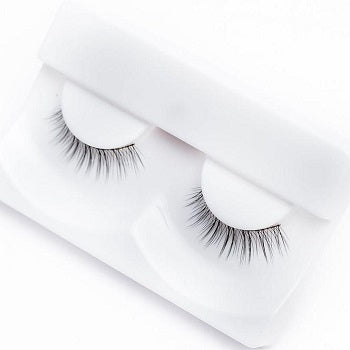
Credit: Pinterest
Finally, it’s time to add a bit of glam to your eye makeup look with false lashes. False lashes can help create a more dramatic and intense look that enhances your natural lashes.
Plus they come in different styles and lengths, so it’s important to choose the right ones that suit your eye shape and desired look.
Once you have your preferred lashes, you'll need lash glue, tweezers, and a pair of scissors.
- Start by measuring the lashes against your natural lash line to ensure they fit well. In most cases, they tend to be a bit longer. So unless you're using half lashes, you'll need to customize your lashes and your eye length.
- Get a pair of scissors and cut out the excess and measure again to be sure it fits. Always cut from the back and not the front of the lashes, because the back of the lash is usually longer than the front. Cutting from the front could ruin the shape of the we lash and well it sits on your natural lash line.
- Apply a thin layer of lash glue to the lash band and let it sit for a few seconds to become tacky.
- Place the lash as close to your natural lash line as possible. You can use your fingers or tweezers for this.
- Press the lash gently to hold it in place and wait for the glue to dry.
- Apply mascara to blend your natural lashes with the false ones. If you've already applied mascara before now, you can skip this step.
-
-
For those who want to take their lash game beyond falsies, PLA Pro volume lash extensions deliver a fuller, dramatic look that lasts, making them a go-to choice for both makeup artists and beauty lovers who crave extra impact.
Conclusion
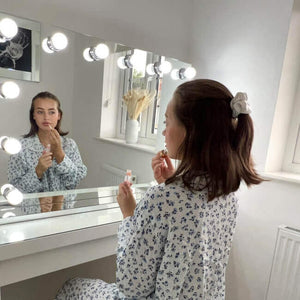
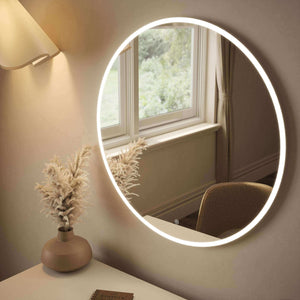
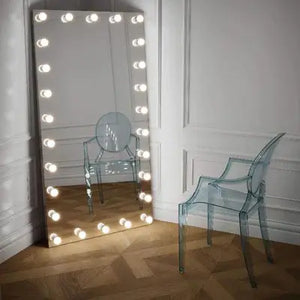
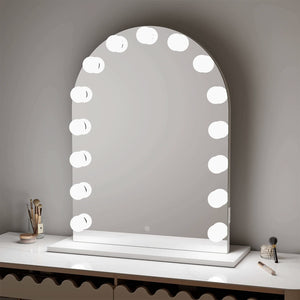
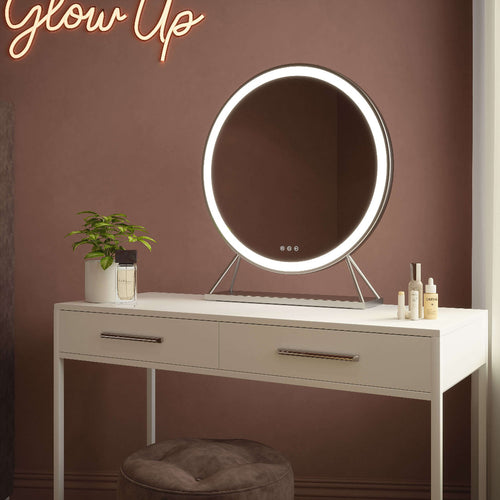
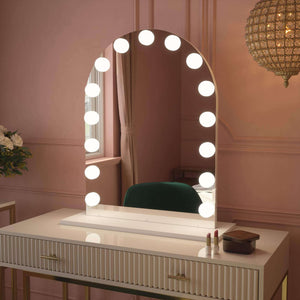
To make your eyes look great with makeup, you need to practice a lot and be patient. It might take some time to figure out what works best for you. But if you have the right tools, makeup mirror, products, and techniques, you can create an eye makeup look that will make you look amazing and highlight your natural beauty.
Remember to always prep your eyelids before applying any makeup, choose the right eyeshadow blending brushes, and apply eyeliner and mascara to complete your look. And don’t forget to set your brows to frame your eyes perfectly.
False lashes are optional, but if you do decide to wear one, choose a pair that enhances your natural lashes.
With these simple steps and tips, you’re well on your way to creating a stunning eye makeup look that boosts your confidence and enhances your natural beauty.
So, go ahead and experiment with different eyeshadow colors, eyeliner styles, and mascara formulas until you find your perfect eye makeup routine.
Liquid error (sections/article-template line 192): Invalid form type "97\n", must be one of ["product", "storefront_password", "contact", "customer_login", "create_customer", "recover_customer_password", "reset_customer_password", "guest_login", "currency", "activate_customer_password", "customer_address", "new_comment", "customer", "localization", "cart"]


 Angelina Full Length Arch Hollywood Mirror 160 x 60cm
 Angled Luna Mirror-Cheval Black
 Angled Luna Mirror-Cheval Silver
 Art Deco Overmantle Mirror in Grey 105cm x 86.5cm