What Tools and Materials Do You Actually Need?
Before you start waving that screwdriver around - hold up. Let’s talk gear.
You’re not just grabbing "a drill and some screws", yeah? Each bit in your kit solves a different problem. It’s like making tea without the kettle - technically possible, but miserable.
According to the UK DIY & Home Improvement Market Report 2024, 63% of small home repair fails come down to wrong or missing tools. Sixty-three percent! So yeah, this bit matters more than it looks.
Stuff you actually need (and why)
-
Electric screwdriver or drill-driver Right, so this thing isn’t magic - it just spins faster than your wrist ever could. The sweet spot? A cordless drill-driver around 12-18V, enough juice to bite into brick without smoking the motor. The torque - basically twisting power - runs about 40-60 Nm, which is about what a pro joiner’s wrist can crank when tightening by hand. If it’s stopped working, it might need maintenance (see this guide for help).
-
The right screwdriver bit (usually Phillips or Pozi) This one trips up everyone. Phillips (PH) and Pozidriv (PZ) aren’t the same, even though they look like twins. In the UK, nearly every screw you’ll touch is PZ2. Use the wrong one and it’ll cam-out - bit slips, screw head chews up, job ruined. It’s why 30-40% of stripped screws happen. Not bad luck. Just wrong bit.
-
Drill bits that fit your wall plugs Example: red plug, 6 mm masonry bit; yellow plug, 5 mm. Don’t eyeball it - 0.5 mm too wide and you’ve just lost 25% of your holding strength. Too small and you’ll split the wall or crush the plug.
-
Wall plugs for your wall type These bad boys do the heavy lifting. They spread pressure from one screw into a wider grip. Use the right one and your load capacity can shoot up 80%. Use the wrong one and it’ll tear out before you even hang the thing.
-
Screws that match the plugs Basic rule - let that screw bite 30-40 mm into solid wall or all the way through a plasterboard anchor. Too short and it’s hanging on vibes.
-
Pencil Don’t laugh. A 2B pencil leaves clean marks that wipe off later without carving trenches.
-
Tape measure This isn’t optional. 70% of misaligned hangings come from dodgy height references, not bad measuring.
-
Spirit level Long one’s better - like 600 mm+ - so it smooths out wall bumps. You want less than 2 mm deviation per metre or it’ll bug you forever.
-
Masking tape Cheap insurance. Tape before drilling so paint doesn’t chip, and wrap a bit round your drill bit to mark depth.
-
Stud/pipe finder Don’t be a hero. Around 14,000 accidents a year happen because someone drilled into a pipe or cable. This thing prevents your wall from becoming a sprinkler.
Every tool’s there for a reason. Skip one and you’re basically gambling your weekend.
How Do You Identify Your Wall Type?

Let’s not sugar-coat it - if you don’t know what kind of wall you’ve got, you’re building on a lie. Engineers say your wall material decides 60-70% of total strength, no matter how fancy your screw is.
The quick test
-
Plasterboard (drywall) Give it a tap. Hollow "boxy" sound? Bit of flex if you push? That’s plasterboard. Usually 12.5 mm thick, screwed to studs. Alone, it’ll hold 10-15 kg tops before it gives up.
-
Masonry (brick/block/concrete) Feels rock solid, no bounce. Tap it - it thuds. Proper brick can carry 120-150 kg easy with standard plugs if you drill clean.
-
Stud finder check Use one. Finds timber or metal studs hidden behind that paper wall. Hit one of those, and you’re basically hanging off steel - super strong.
Why it matters?
-
Plasterboard with wrong fixings will spin out, crumble, or just... fall off (source).
-
Masonry’s tougher, but if you crack it near the edge, game over.
Step one: know your wall. Saves you patching a crater later.
Which Fixings Should You Use for Your Wall?

Fixings are like the quiet heroes behind the curtain - no one sees them, but when they fail, everyone knows. Data shows using the right anchor makes your setup 300-500% more durable. That’s not a typo.
For plasterboard (hollow walls):
-
Self-drill anchors Just screw them straight in - no pilot hole. Spread the load, hold 10-15 kg each. Perfect for your medium mirror job.
-
Hollow wall anchors (metal/plastic) You drill, insert, then they open their little "legs" behind the board. Think toggle bolts for Brits. Hold 20-25 kg per fixing when tightened right.
-
GripIt or multi-wing anchors UK-made genius bit of kit. Wings open wide behind the plasterboard, hold up to 100 kg shear load when done properly. Great for heavy mirrors.
-
Stud screws Lucky enough to hit a stud? Regular wood screw. Strongest hold you’ll get in plasterboard - basically unshakeable.
For masonry (solid walls):
-
Standard plugs (red/yellow/brown) Expand when the screw goes in - up to 1.4x diameter - and grip like mad.
-
Heavy-duty plugs or frame fixings Longer, thicker, and good for chunky mirrors or deep plaster.
Weight check - heavy mirrors (say, framed glass over 15 kg) need serious anchors. Don’t trust a cheap plug; that’s how people end up on TikTok with a cracked mirror and bruised pride.
Rule: plasterboard needs fancy fixings, masonry’s simple but unforgiving. Pick smart.
How Should You Prepare the Mirror for Mounting?
Here’s where the glass meets gravity. Most cracks - around 70% of them - come from twisted or stressed frames, not drilling. So, slow down and look at how your mirror’s built.
Back hardware 101:
-
Keyhole slots - Those metal plates with the "fat top, skinny bottom" holes. You hang them like a picture - big hole over screw head, drop down to lock. Looks slick but needs perfect spacing.
-
D-rings - Little loops screwed into the frame. These pivot, so they forgive slight measurement errors. Bless them.
-
Wire hangers - Wire strung between two eyelets. Handy, but remember the pressure’s all on those two screw heads. Good for light to medium mirrors only.
-
French cleats - Two angled bits, one on wall, one on mirror, they wedge together. Super secure, super pro. Used for heavy or wide pieces.
You want two fixing points minimum.
-
One point? Nah. That’s how mirrors spin, twist, and scrape paint.
-
Two points = balance, longevity, peace of mind.
Basically: understand how it hangs before you even touch the wall. Saves your frame and your temper.
How Do You Mark Accurate Screw Positions?
Right, so this is where the amateurs mess it up - nearly 80% of DIY hangings are off by 3-5 mm. Doesn’t sound like much until you’re staring at a slightly crooked mirror every morning.
Here’s how to nail it:
-
Measure your hanging points - For keyholes, go centre-to-centre, note the drop from the top edge. For D-rings, pull them tight as if they’re hanging, measure that spread.
-
Mark it on the wall - Decide height, find centre, work outwards. Eyeballing it never works.
-
Tape the spot - Masking tape before drilling keeps paint from flaking. Also handy for marking your drill depth.
-
Level it - Use your spirit level. Bubble dead centre. Remember, old houses lie - sometimes your floor’s the thing that’s crooked, not your eye.
-
Double-check everything - Distance between marks, spacing, level - all of it. Even a 2 mm error can throw the whole thing off.
Quick pro tip: mark your bit with tape to control depth - stops you drilling into next door’s living room.
How Do You Drill the Holes Correctly?

Drilling’s the make-or-break part. Literally. Roughly 45% of plug failures come from bad drilling, and half of those from going too deep or at an angle.
For masonry:
-
Use carbide-tipped masonry bits - they’ll survive 150-200 holes before dulling.
-
Hammer mode? Yep, but gentle. Let the drill do the work, not your shoulder.
-
Drill a bit deeper than your plug - so it can seat without bottoming out.
-
Clean the hole - seriously, dust kills grip. Just tapping or vacuuming boosts hold by 25-30%.
For plasterboard:
-
Self-drill anchors? Low speed, straight in, stop when flush. Spin it and it’ll just shred the hole.
-
Hollow wall anchors? Pilot hole first, insert, tighten or use setting tool till it clamps. Feels snug? Perfect.
-
Don’t over-drill - the plasterboard’s strength comes from its paper face. Tear it, and you’re basically drilling into a biscuit.
Low speed, straight aim, patience. That’s it.
How Do You Drive the Screws to the Right Depth?
Torque control’s your friend here. Too hard and you’ll strip the plug. Too soft and it’ll wobble. 35% of cracked plasterboard anchors are from overdriving, not weight.
Steps to keep it clean:
-
Start slow - hand-thread the screw to keep it straight.
-
Go in with the drill at medium speed.
-
If you’ve got torque settings, aim around 2-4 Nm for masonry, 0.8-1.2 Nm for studs.
-
Leave the screw head 3-5 mm proud of the wall if you’re using keyholes or D-rings.
-
Adjust a quarter-turn at a time. Fine-tuning’s where the magic happens.
How Do You Hang the Mirror Safely and Evenly?
This is it - the moment of truth. And yeah, you’ll probably sweat a bit. It’s normal. About 20% of mirror breakages happen during hanging, not drilling.
Follow this:
-
Lift with both hands, mirror close to your chest. If it’s big, grab a mate.
-
Hook it gently - keyholes slide down, D-rings rest under the screw heads.
-
Lower it slow; glass edges chip if they so much as sneeze on plaster.
-
Spirit level on top - tiny screw tweaks fix most misalignment.
-
When it’s right, test it. Little downward pressure, bit of side wobble. It should feel rock solid.
Patience beats strength every time.
What If You Want a Minimal-Damage Option?
Renting? Fair. You want it removable, not permanent. There’s a trade-off though - less damage = less strength.
Your best bets:
-
3M Command Strips - Stick-on pads, weight-rated, easy off. Great for light mirrors on smooth walls. But if you overload them - bye-bye glass.
-
Adhesive mirror pads - Foam-backed, fine for tiny mirrors or tiled bathrooms. But don’t trust them on rough paint.
Tips for adhesives:
-
Clean the wall first. Dry, grease-free, spotless.
-
Let adhesive cure properly - people rush this and then blame the strips.
-
Oh, and don’t yank them off - pull them down slowly, like the packet says.
They’re good, but don’t push it. Anything heavy or hanging above a bed? Go mechanical. Adhesives are fine until gravity gets moody.
Common Problems and Quick Fixes
Fixing spun in the wall? Classic. Too big a hole or bad plug. Try a larger plug or filler and re-drill once it’s set. For plasterboard, switch to a hollow-wall anchor - it clamps itself.
Hole’s mangled? Fill it. Let it harden, move over a touch if needed. Sometimes a 5 mm shift saves you patching paint.
Mirror crooked? Adjust screw heights a hair - quarter turns can fix it. If it’s way off, better to redo one hole properly than live with tilt-shame.
Feel a "crunch" drilling? Stop. You probably hit something. Scan the wall, shift slightly, don’t brute-force it.
Frame under tension? Loosen, adjust, make sure both fixings share the load. Twisting glass is a fast way to meet seven years bad luck.
Summary: Fast Checklist
-
Check wall type first.
-
Match drill bit to plug, plug to wall.
-
Measure twice, drill once.
-
Keep holes clean, screws proud.
-
Level before and after.
-
Test for wobble.
-
Adhesives only for light stuff.
All the boring prep and numbers? They’re what make it look effortless. Because confidence comes from knowing you did it properly - not from pretending you can’t mess it up.
Liquid error (sections/article-template line 192): Invalid form type "45\n", must be one of ["product", "storefront_password", "contact", "customer_login", "create_customer", "recover_customer_password", "reset_customer_password", "guest_login", "currency", "activate_customer_password", "customer_address", "new_comment", "customer", "localization", "cart"]

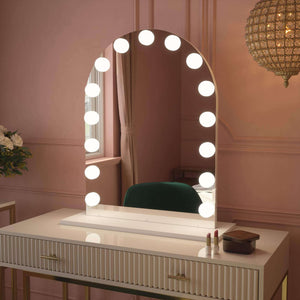


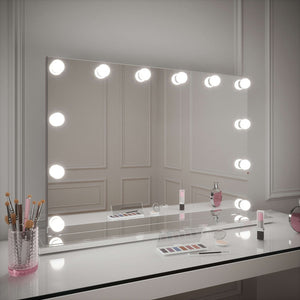
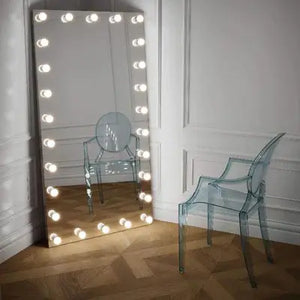
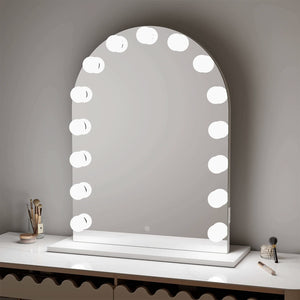
 Angelina Full Length Arch Hollywood Mirror 160 x 60cm
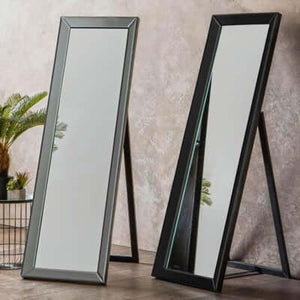
 Angled Luna Mirror-Cheval Black
 Angled Luna Mirror-Cheval Silver
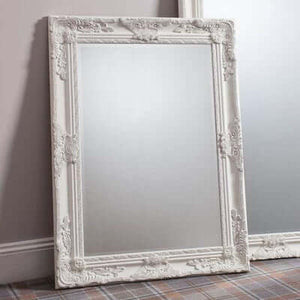
 Art Deco Overmantle Mirror in Grey 105cm x 86.5cm